Sunday, December 15, 2013

Lego Birthday Party


For Aedan's 6th birthday, he wanted a Lego party. Originally, I was going to have 5-6 of his friends over to build Legos and keep it super casual. Our condo isn't huge, so we thought this could get a little crazy. So, once again, we took the party to a local park. His birthday is in November so I always get a little nervous about the weather, but it turned out to be a beautiful day.


Even though Aedan primarily loves Star Wars and Ninjago Legos right now, I decided to just keep the theme focused on the primary Lego colors: blue, red, green and yellow. It was also very difficult to find plates and other decorations to match Star Wars Legos. There were a lot of City Lego party stuff but we haven't gotten into those. I also wanted to keep it affordable since we weren't supposed to have a big party. I bought green table clothes, blue cookie napkins, red large napkins and yellow plates.

I found this printable Lego banner for free that said "Happy Birthday". I printed it on card stock and taped string to the back to keep it together. I also had my son pick different lego figures to put around the party.

Dessert


Aedan isn't a big fan of cake and requested cookies for his birthday dessert. I made three types of cookies to make it a little more special: chocolate chip, peanut butter chocolate chip and outrageous chocolate. My husband built a lego radar tower for the candles to go with the racing theme. Aedan thought this was super cool and picked out a storm trooper to stand on the tower and also hold a candle.

Favors


If possible, I like to incorporate the favor into the party. This was fun and easy for legos. We ended up with 16 kids attending the party, so I bought lego pieces to build race cars. I purchased two of these Lego wheel kids and one box of 200 or so Legos to use for adding the car walls. For the bags, I downloaded a free Lego font to make the labels. I also used the font for other signs at the party. Since the Legos can easy roll off the table, I had these yellow plates for each kid to dump their Legos out and build. We drew a different Lego face on each plate and the kids loved picking which face they wanted.


Most kids were 5-6 years old and this project was a little difficult for them. I made sure there were enough pieces for each set to make a car. It was a little tricky for the kids to figure out and the adults had to help most of the kids. They still had a fun time but this might be better for older kids.


*I also did the a Lego sign that read "6" that is hanging from the tree but didn't take a close up. You'll see it on the tree in the background.

Games

Guess How Many Legos
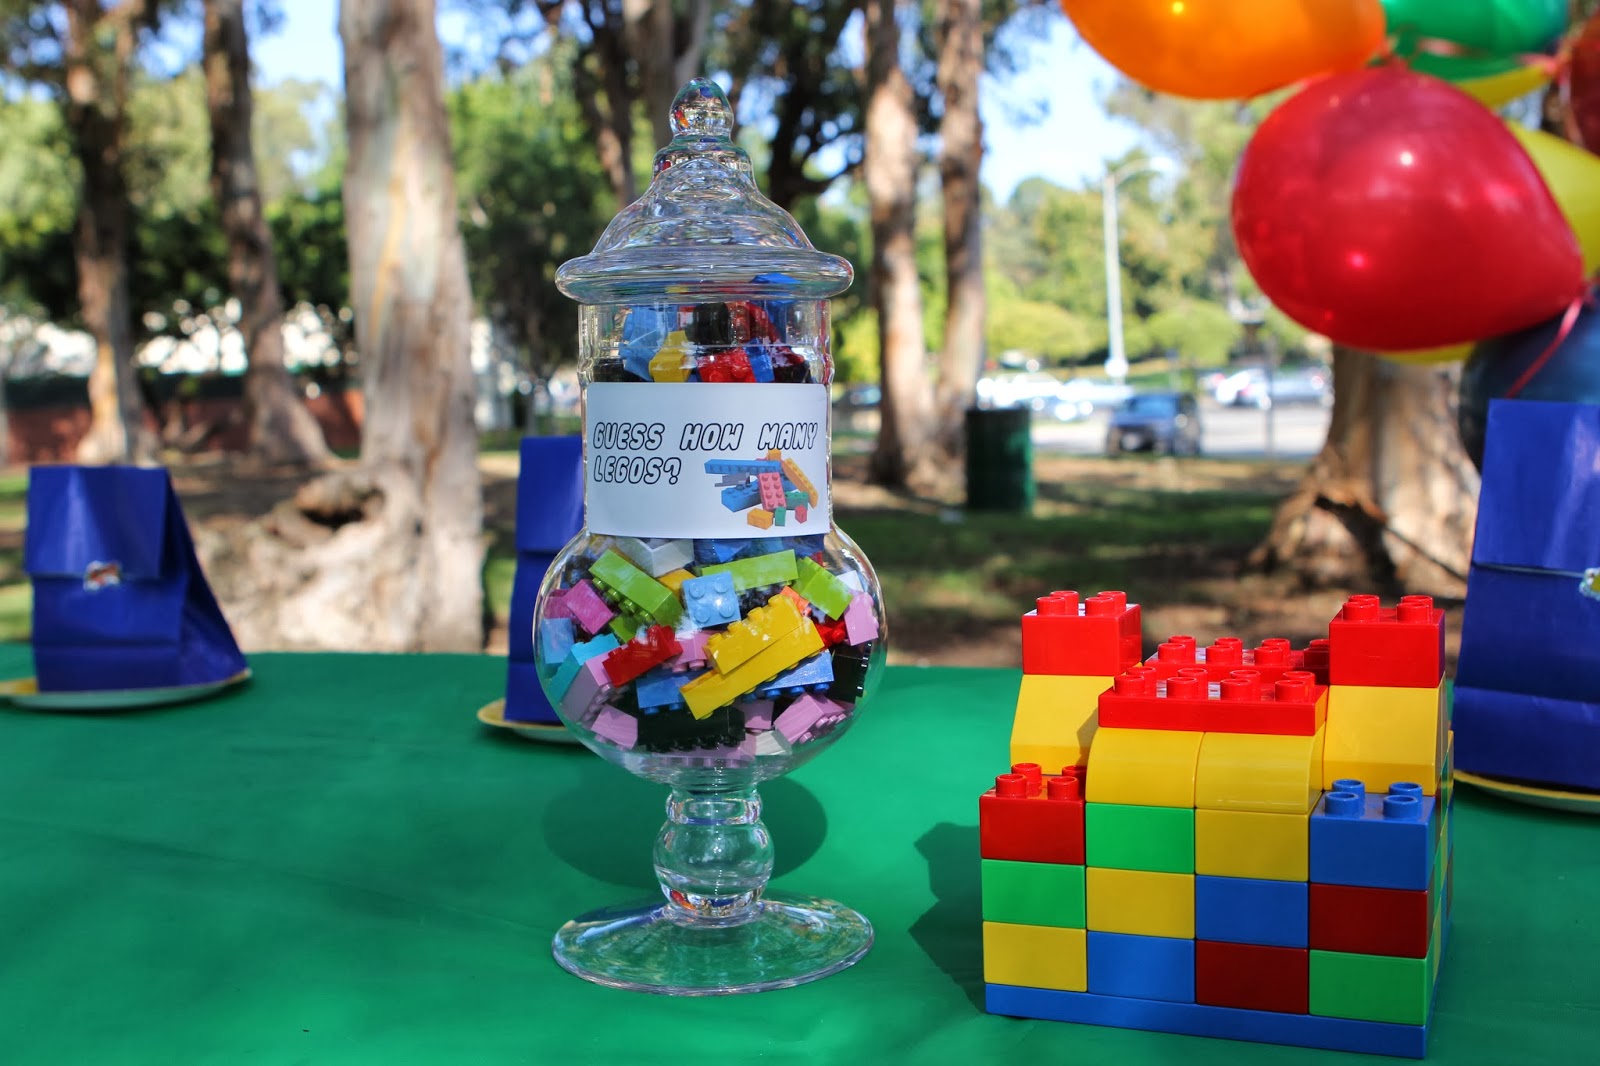


This was an easy game to put together. I used a glass jar that I already had and made a similar label to the ones I used for the bags. I filled it up and put papers and a pencil for the kids to fill out their guess. The Lego structure to the right has an opening at the top where they dropped their guesses. I was surprised that two kids came within 10 Legos of the correct number!

Lego Car Races
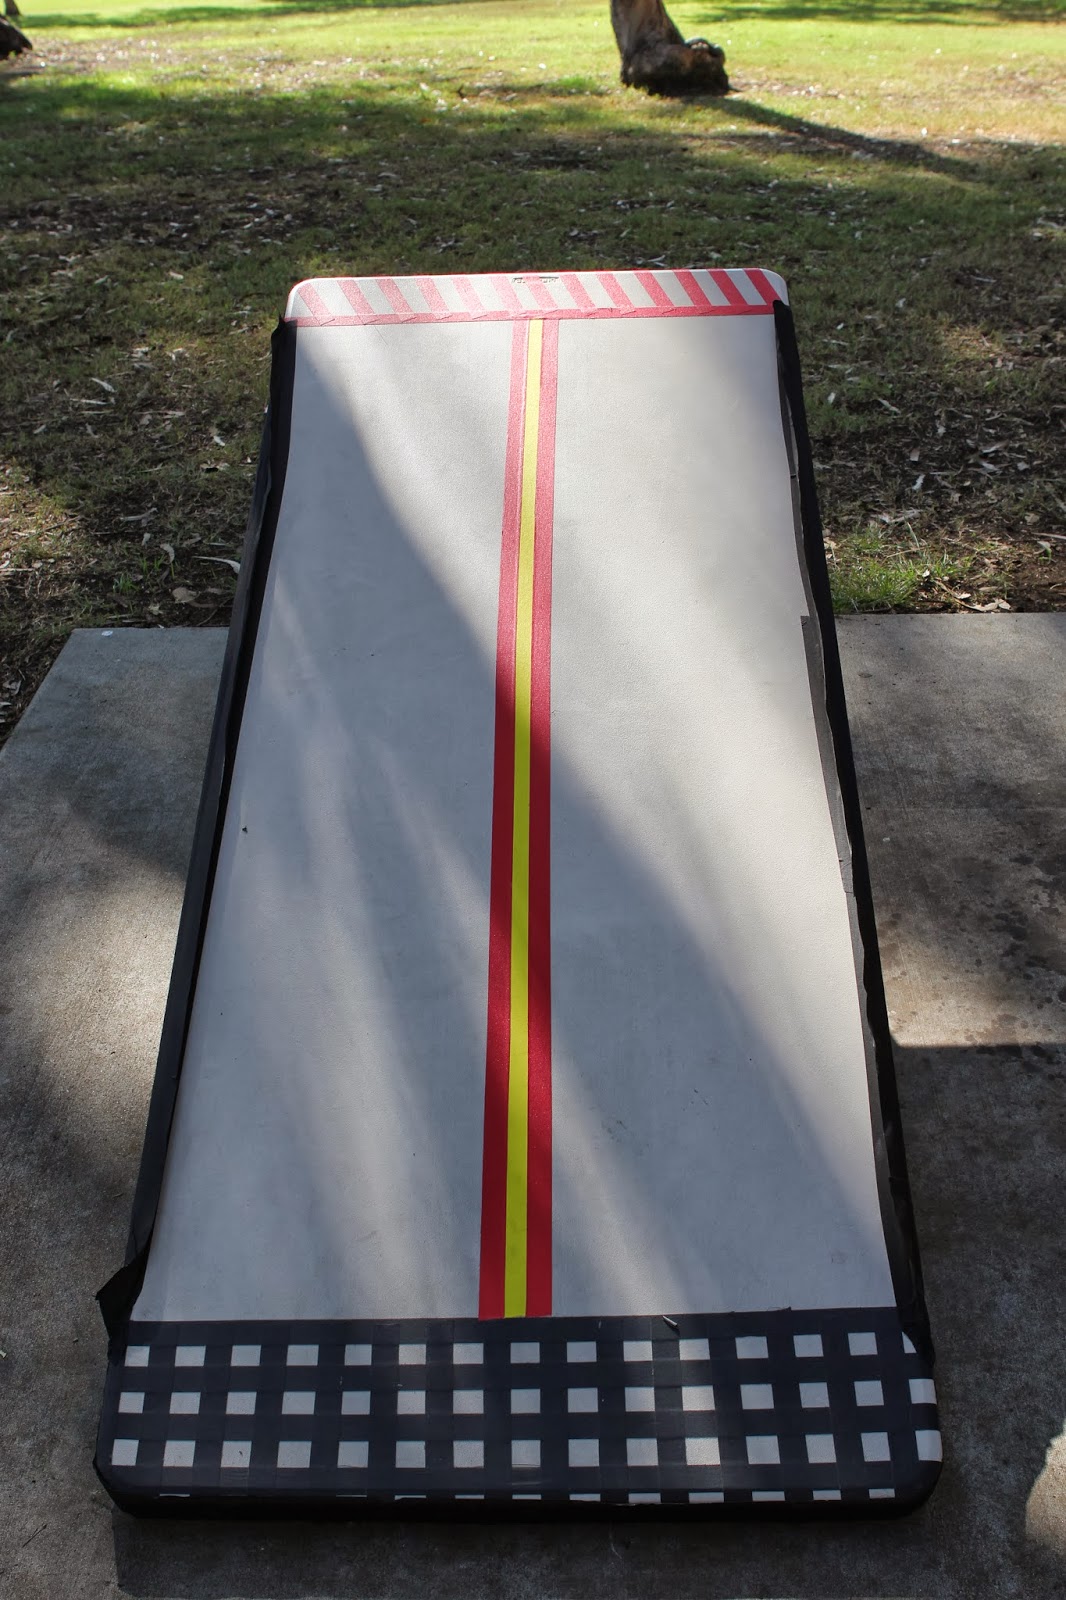


Now for the highlight of the party! We took a large plastic table to make our race track. My husband took this task seriously and got very creative with the tape. The edge even has a 1-2" barrier so the cars wouldn't roll off. We put one leg up and folded the other under to keep it put.


After the kids built their Lego race cars, they paired off to race them down the track. This was definitely a hit. It created some healthy competition, a little frustration but mostly a lot of fun. They were yelling and cheering and so excited for their turn. There were some big crashes and the kids had to rebuild their cars but it was pretty easy to grab the pieces.

Lego Scavenger Hunt


I brought a container full of Duplo Legos with a picnic blanket for all the toddler guests to have something fun to do. For the scavenger hunt, I took 100 Duplo Legos and hid them around the trees, just like an Easter egg hunt. The kids loved it. They went racing around to find the Legos and the kid with the most won a prize.

Saturday, December 14, 2013

Princess Leia DIY Costume

Princess Leia is definitely one of my favorite princesses. I made this costume last year but still wanted to post it, even though I didn't snap that many pictures. For the fabric, I found a white suit material that turned out to be extremely durable. She went rolling in grass right after finishing it and to my amazement, not a mark. It's really worn in now but there aren't any stains on it. I'm not sure what the exact blend was, but I'll be on the lookout for the same fabric and will post it if I find it again.


I used Burda pattern 9541 and sketched my own pattern for the belt.


The dress was pretty simple and I followed the pattern exactly. This definitely was one of my earlier pieces and the edges were a little rough. Of course, she never noticed or cared. She has spent hours and hours in the dress.

Here is the back latch:


For the belt, the below pattern is the basic design that I used. I cut this shape in the white fabric, not on the fold. There was 2 long pieces of white fabric, each one about 24" long by 4" wide at the edges. The point will be wider.


I purchased some silver fabric to look like metal. I cut 4 pieces of silver fabric with the dimensions of 4" by 3". For the other two pieces that included the point, I used the center of the pattern and traced the same height but 4 1/2" wide.


On the 2 shorter sides of all 6 pieces, I ironed 1/2" under. Then, I pinned the silver pieces onto each long white piece, but didn't sew them on. I put the right sides together of the whole belt and sewed the 2 long edges with 1/2" seam.

I turned the belt inside out which was a little tricky. Then I sewed the shorter sides of each silver pieces close to the edge and going through both top and bottom silver pieces. Sewing it after the long edges are sewn will ensure that it doesn't puff out. So, I actually sewed through two pieces of silver material and two pieces of white. The belt should then lay flat.


I finished the two open edges by ironing them over 1/2" and sewing the fabric down. I would do a much nicer job of this now, but it got the job done. To hold the belt together, I added iron-on velcro. Finished, the belt was 23" long.


Friday, November 22, 2013

Rapunzel (Tangled) DIY Sewing Tutorial

For my daughter's 3rd birthday, she was in love with Tangled so we decided to throw her a Tangled birthday party. To go with the party, I made her a Rapunzel dress for her birthday present. It is definitely the best costume I've made so far. She absolutely loved it.


I used Simplicity pattern 2065.

Rapunzel Sewing Pattern


This pattern is perfect, but I like to keep the costumes looking similar to the original, so the light pink and purple weren't going to work. Plus, I figure those light colors will be quickly stained with how my kids play in their costumes. I went to downtown LA fabric district to get the supplies. I spent around $30 on everything. I choose a plum brocade for the underskirt and a matching lilac brocade for the bodice.


It was tricky finding a matching plum satin to use for the overskirt and sleeves. The one I used wasn't the easiest material to sew, but I made it work. It was a lighter weight than some others that I saw. This dress was fairly heavy once finished so I'm happy this fabric wasn't too heavy. I followed the pattern as directed.


I took these photos after the dress was complete, but the grommets didn't hold. I had to hand sew over the grommets to hold them in place. I haven't used grommets that often so I'm not sure if there is a better quality I could have purchased, but the ones I sewed were very strong.


I loved this light pink against the plum purple. I started with the middle ribbon and went outward. I didn't pin it that much at first and that was a mistake. It worked out better when I used a lot of pins. I remember in sewing class, my teacher really emphasized pinning. I sort of blew this off and lightly pinned on most projects. After many annoying mistakes, I've realized pinning is key. I now take the time to pin and it makes a huge difference in cleaner stitches.


I love this danty, cotton trim. I actually purchased this for $0.25 a yard in downtown LA! I attached it by hand since it needed extra attention and sleeve is delicate too.


These sleeves are beautiful and the material isn't scratchy. I think this dress could look amazing with the sheer sleeve and be a little more play friendly.


Here is the skirt liner attached to the mesh:


I was going to embroider the fabric but ended up buying iron-on pieces for the overskirt. They didn't stay on the satin material really well so a few pieces I had to stitch down. I found these at Joanne's and definitely a pricey addition. But, they looked great.


I found the trim in Joanne's $1 trim bin and got 2 packages.


The hair took a while to cut all that yarn! But it looked fantastic and was very sturdy. She loved having the yarn wig. We also had a purchased wig but she wouldn't wear it and it got "Tangled" really fast! This Rapunzel dress was definitely a hit.