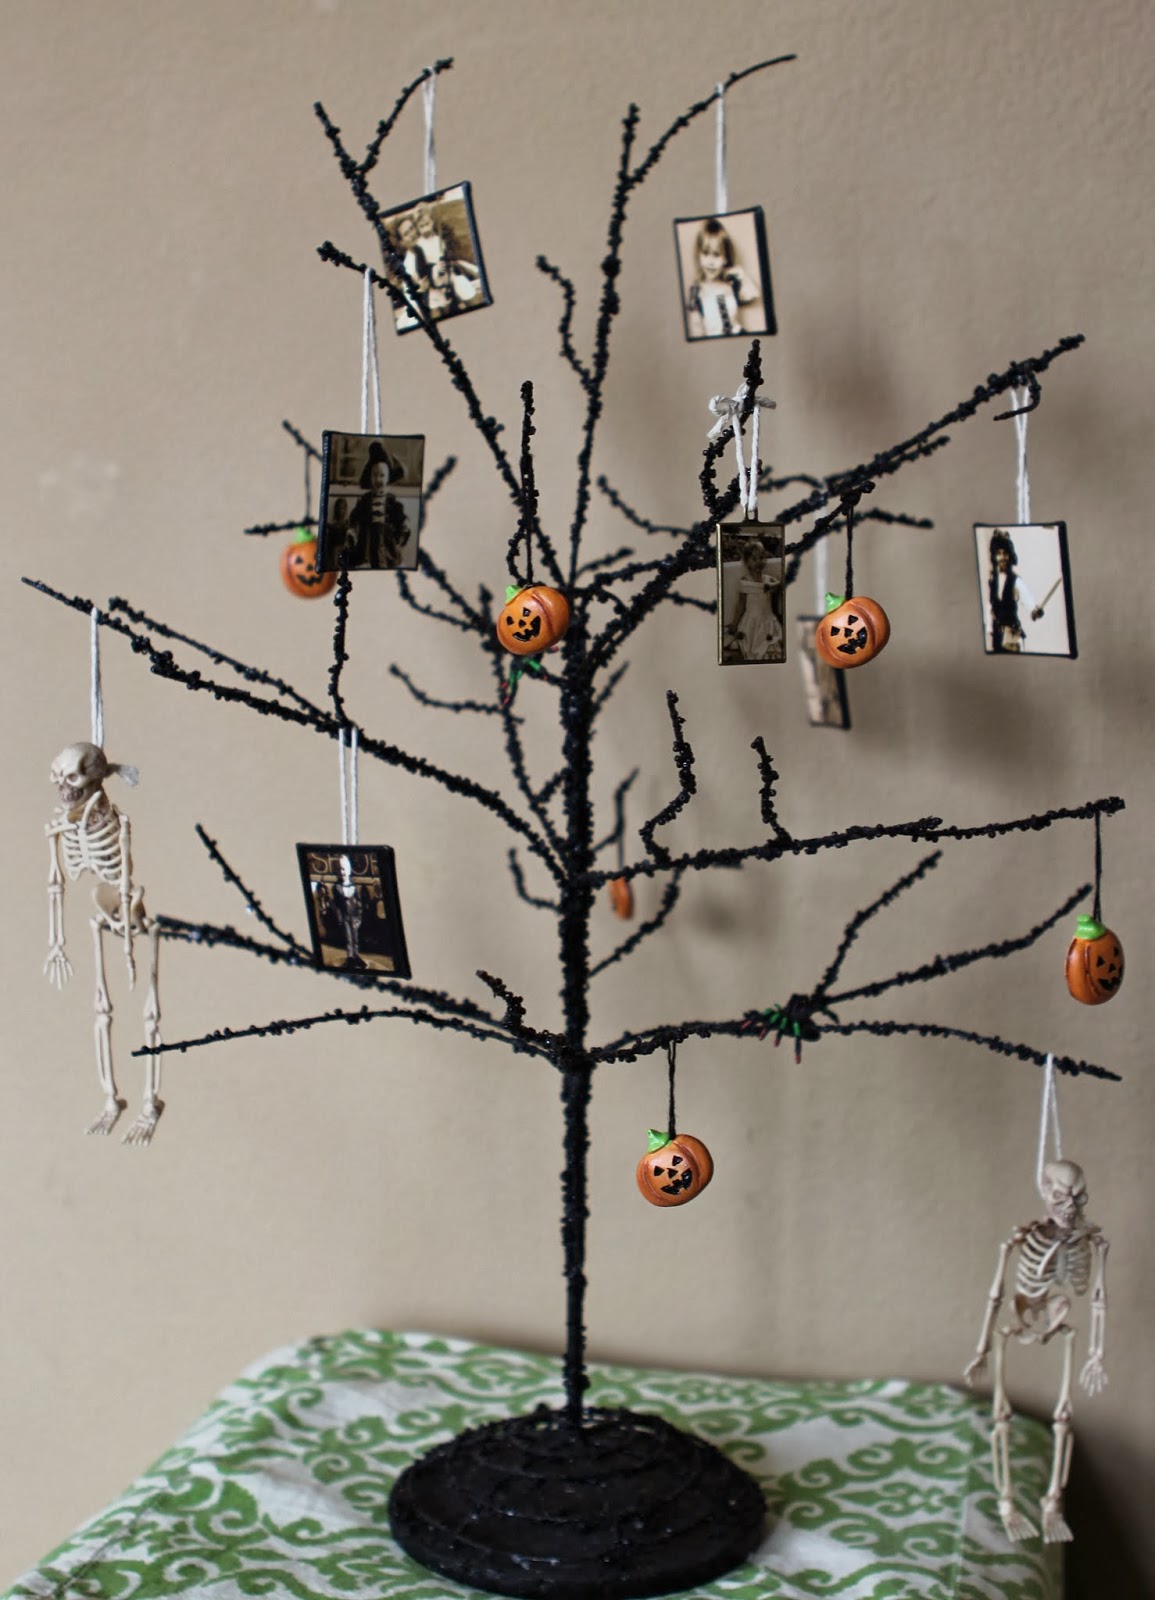
I bought a black Halloween tree to decorate our house without really thinking of what I wanted to do with it. I saw some fun ornaments but most were just too big for our little tree. A friend suggested I make ornaments with scary faces on them. I loved this idea but had a hard time finding good photos to download. Then the idea of a family Halloween tree hit me.
I found small black canvases at Michael's that came 8 in a pack. I picked photos from past Halloweens to include on the tree.
For the Belle costume ornament, I had a package of the Modge Podge metal necklace and ring kit. I used one of these for this ornament. The other pieces in that kit were really small, but this fit perfectly for the shape of her photo.
It was difficult cropping the photos for printing. I wanted to make sure the whole costume would fit but since they were small, I didn't want too much extra space around each kid. To get this right, I opened up the photo and enlarged the photo on my screen to the size of photo I would print. This way, I could hold up the canvas to see how the photo would fit. I could them crop the photo correctly.
I already had this string, so I cut 2-3 inch pieces for each ornament. I stapled them onto the canvases before adding the photos. This is key! I stapled one after adding the photo and it went straight through the photo.
To cut straight edges on the photos, I used a rotary trimmer and glued the photo onto the canvas. I then added the matte Modge Podge.
They turned out great! My friends and family loved seeing all the past costumes and pictures. I'm excited to make the ones from the pictures we took this year.
Showing posts with label Halloween. Show all posts
Friday, November 15, 2013
Thursday, November 14, 2013
DIY Halloween Apothecary Jars
Halloween is a huge ordeal in our house. We love Halloween! I will do a lot of posts on Halloween so here's my first. I wanted to turn my kitchen into a witch's den, so I decided to make apothecary jars. You can buy these but I found they are pretty cheap to make. I also add 1 or 2 every year.
Here's what you need:
1. Jars: Look at Michael's for some pretty cheap jars that come with corks. I paid $1-2 for the smaller ones. My grandmother gave me an old syrup jar to use. I used a jam jar. There are so many options. I mainly look for neat shapes or antique looking jars. I also like a flat front to put the label. Some of the jars I leave label free.
2. Rope, twine or leather: I had some leather from another project I used to tie around the top for an antique look. I also used different ropes to twine to create a similar look.
3. Modge Podge: I used gloss for mine but there is also a matte Modge Podge, which I will probably use for future bottles.
4. Labels. I downloaded free labels at Love Manor. Since I did these, I've noticed many other sites with cool labels. I printed them on cardstock. Glued them onto the bottles and put Modge Podge over the label. The Modge Podge will keep them labels looking good for years to come.
5. Ingredients: Some of the ingredients were hard to find. I looked at all the labels first, made a list of which ones I liked and went shopping. Make sure you have the ingredients before glueing the labels. If you can't find something on your list, it will be hard to remove the labels.
For my worms, I used gummy worms for a couple of years but it was such a pain to clean the jar after. I also didn't really want more candy in the house. I ended up finding fake worms at a Halloween store and mixing them with dirt.
For the snake jar, I used 2 large snakes with several small snakes.
For the ghost smile, I mixed corn syrup and green food coloring to make a thicker consistency. The snake oil was just water and food coloring. Next year, I might put vegetable oil mixed with food coloring to make it look thicker. The jar in front without a tag is flies from a Halloween store mixed with water and food coloring. I put a piece of brown linen that I had in my fabric bins and held it on with twine. The poison bottle have different colors of food coloring. I tried to use different colors throughout the apothecary to make it a little more exciting.
The spider bin was easy since you can get spiders anywhere. I like the bigger ones and if you can get a creepy looking spider, that would make this extra spooky. I also added spider webs in the jar.
My kids love the dragon blood bottle and I made the water blue for a fun effect. The bottle to the left of the dragon blood that doesn't have a label is cockroaches. This round bottle was too hard to attach a label, but the cockroaches look creepy in person. Behind the cockroaches is a fairy dust. I used fine purple glitter to make this effect. The mood dust is a mixture I used to make my kids quiet time bottles. Here are the directions for that at My Crazy Blessed Life. I liked how the glue made the glitter sort of float around and not settle.
I bought a bottle of fake blood for the vampire blood. This wasn't cheap, about $8 but I keep it in there year after year. Plus, it really has the blood look. The werewolf fur is doll hair. Have fun making your own Apothecary jars! If you have any good ideas for jars, please leave a comment!
Here's what you need:
1. Jars: Look at Michael's for some pretty cheap jars that come with corks. I paid $1-2 for the smaller ones. My grandmother gave me an old syrup jar to use. I used a jam jar. There are so many options. I mainly look for neat shapes or antique looking jars. I also like a flat front to put the label. Some of the jars I leave label free.
2. Rope, twine or leather: I had some leather from another project I used to tie around the top for an antique look. I also used different ropes to twine to create a similar look.
3. Modge Podge: I used gloss for mine but there is also a matte Modge Podge, which I will probably use for future bottles.
4. Labels. I downloaded free labels at Love Manor. Since I did these, I've noticed many other sites with cool labels. I printed them on cardstock. Glued them onto the bottles and put Modge Podge over the label. The Modge Podge will keep them labels looking good for years to come.
5. Ingredients: Some of the ingredients were hard to find. I looked at all the labels first, made a list of which ones I liked and went shopping. Make sure you have the ingredients before glueing the labels. If you can't find something on your list, it will be hard to remove the labels.
For my worms, I used gummy worms for a couple of years but it was such a pain to clean the jar after. I also didn't really want more candy in the house. I ended up finding fake worms at a Halloween store and mixing them with dirt.
For the snake jar, I used 2 large snakes with several small snakes.
For the ghost smile, I mixed corn syrup and green food coloring to make a thicker consistency. The snake oil was just water and food coloring. Next year, I might put vegetable oil mixed with food coloring to make it look thicker. The jar in front without a tag is flies from a Halloween store mixed with water and food coloring. I put a piece of brown linen that I had in my fabric bins and held it on with twine. The poison bottle have different colors of food coloring. I tried to use different colors throughout the apothecary to make it a little more exciting.
The spider bin was easy since you can get spiders anywhere. I like the bigger ones and if you can get a creepy looking spider, that would make this extra spooky. I also added spider webs in the jar.
My kids love the dragon blood bottle and I made the water blue for a fun effect. The bottle to the left of the dragon blood that doesn't have a label is cockroaches. This round bottle was too hard to attach a label, but the cockroaches look creepy in person. Behind the cockroaches is a fairy dust. I used fine purple glitter to make this effect. The mood dust is a mixture I used to make my kids quiet time bottles. Here are the directions for that at My Crazy Blessed Life. I liked how the glue made the glitter sort of float around and not settle.
I bought a bottle of fake blood for the vampire blood. This wasn't cheap, about $8 but I keep it in there year after year. Plus, it really has the blood look. The werewolf fur is doll hair. Have fun making your own Apothecary jars! If you have any good ideas for jars, please leave a comment!
Subscribe to:
Posts (Atom)


